Wednesday, September 25, 2013

Snow Basin

Sunday was our first trip to Snow Basin.  We went with some friends to the lodge at the top for Sunday Brunch and it was just a gorgeous fall day!  Ready to go back next year.  Hard to beat a day on top of a mountain, gondola ride, food, and friends!


Saturday, August 31, 2013

Computer Woes Over!

Yea!!  Got my laptop back.  Thank goodness it just needed a new battery!  Apparently, batteries can swell and create havoc with the track pad.....and I thought it was possessed!

Back to posting.  This quilt was our 2012 Kaffe Club row of the month.  Most of the blocks in each row are "wonky", which for me was really a challenge because I like things to line up and points to match.  Even the scallops are wonky, and if you zoom in you can see the narrow piping in the binding.  This is my second quilt using all Kaffe fabric.  We had an exhibit of 19 of these quilts at HMQS this past spring.  None of them looked alike because of row placement and color choices.  This one was really fun to make.  The rows were all designed by Kaye Evans, who has taught Kaffe Club for six years.  Thanks Kaye!


Saturday, August 24, 2013

Computer woes continue!

I'm trying this out on my iPad.  My laptop is in the Mac hospital!  The track-pad was going crazy, doing strange things even when I wasn't touching it.  Possessed?!

Now if someone could tell me how to upload a photo from Photo Stream, I'd really be a happy camper.  Yep, just wasted two hours trying!


Friday, August 23, 2013

Bad Computer!!

My little old Mac is giving me hissie fits! Think it is time to take it in to the 'puter Dr.  Anyway, I can't believe that it is almost the end of August already!  This summer has been busy, but fun.  We spent a week in NM.  Santa Fe and Red River were wonderful.  We will definitely go back for another visit.  Of course visiting quilt shops there and on the way were a must and I found some neat "had to have" things.

Red River is a ski town and our condo faced the river and one of the chair lifts.  The funniest thing ever was this little deer.....

We were on our balcony and luckily my camera was within reach.  Have you ever heard of a deer squatting?  We haven't.  Plus, she kind of looks like a kangaroo!  Well, she squatted and then.....


she went a few feet upstream and got a drink!

Saturday, June 22, 2013

New Projects


The pattern for this quilt is called Science Fair by Jaybird Designs.  They also have designed the ruler Hex n'More which was a pleasure to use, once I remembered to use the correct end of the ruler!  I was cutting the gray background half hexies lickity split.  Then I started cutting the strip sets for the colored hexies and realized that I wasn't cutting triangles, I was still cutting half hexies!  The triangle part of the ruler was on the other end!  Of course I didn't have enough fabric for another strip set.  That's why some of the hexies are different.  But, I think it adds some interest!  Maybe a happy mistake?


These blocks are called Star Fusion.  Our Guild brought in Janna, from Bloc-Loc for a class on how to use her ruler to make Half Square Rectangles.  this is not how the blocks will go together, there will be pieced sashing that will make a secondary star, but I wanted to see what would happen without the sashing.  I love the new bright colors and solids!

Seems like this post is more about rulers than anything else.  I confess....I am a ruler and gadget junkie!

Saturday, June 1, 2013

50th Wedding Anniversary (two years ago!)

This post was ready to publish in July 2011, but was saved as a draft so here goes:

I can't believe that it is almost the end of July already!!  It's been a long time since I've tried juggling and remembering some kind of schedule (since retiring, maybe), and the last three months have been just that.  We had our entire family here to help us celebrate our 50th wedding anniversary in June.  What a great time we had.  The gang from FL arrived and when the kids got up the next morning we had snow!  Makayla, didn't remember seeing snow before, so she and her brother were out making snowballs!

 By the time she got dressed most of the snow had melted, but there was enough to make a pile of wet, heavy snowballs.  It was so cold here that we had to get them some warmer clothes to wear.

I'm Back!

After a lo-o-o-ong hiatus, I've decided to start posting again!  Lots of things have happened during my absence from blogland....too many to play catch-up, so it will be a new beginning.  I will post a few pictures and / or stories from the last two years, but I like to live for today, so most will be current events (I hope).  More in a bit.....

Wednesday, June 22, 2011

New Storage

Yea!!!  I got rid of the old, bulky shelves in my sewing room. (Can't quite bring myself to call it a "studio")  My son-in-law was here for a visit so I put him to work!  We went shopping at the local home improvement centers and found the storage cabinets and added the drawer units and shelves.  There are still some things to be rearranged and changed, but I love it.  The old unit had three big shelves so I had all of my fabric in odds and ends of plastic bins stacked three high.  Of course every time I needed a piece of fabric it was in one of the bottom bins.  Now I can just pull open a drawer to find get what I need.  Boy, did I find a lot of "what were you thinking" and "ugh, this is really bad" fabric that got weeded out.  It's very interesting to see what colors and types of fabric were "in" and that I really liked once upon a time.  I can't remember who made the comment, "if it's still ugly, you just haven't cut it small enough", or something like that.  That's about 99% true, but there are some fabrics that are just plain bad.  My new rule is that I can't add new fabric if it won't fit in the existing space.  Think that will work?


The old tv has to go!  Mr. D suggested a new flat screen that will fit on the top shelf to right of the iron.  Should fit perfect.  For now I just have to move the old one out of the way.

Summer Roses

Summer is officially here!  The sun is shining and the temperature is rising....finally!!  I had to take some pictures of our roses so Mr. D could see how gorgeous they are. He's been house bound for the past week due to extensive foot surgery. 

                                        Big old bumble bee enjoying the roses.

                                                           My favorite

                             Check out all the buds!  This one blooms all summer!

Robin Update #3

Lea sent me a note that Mrs. Robin decided to lay her eggs in nest #3.  She thinks there are two eggs.  Building two nests and refurbishing one seems like a lot of work for two eggs.  It will be interesting to see if another pair of birds add to this little village of nests next year.

Wednesday, June 1, 2011

Robin's Nest Update #2

Just got another update on "Mom Robin". ......

" I talked to Lea yesterday and that silly bird is still working on all three nests! Mr. Robin is still hanging around with his dorky mohawk, waiting for her to complete her task. I really think we need a web cam in place on the TPQR porch to monitor the progression of the nest neighborhood. Could she possibly connect the three nests to make a McMansion? "


I think a web cam would be a great idea, especially since the Robins are in Idaho and we are in Utah!  This pair is just too funny.  Maybe Jim could drill holes in the rafters, so the rooms (nests) could connect.


Tuesday, May 31, 2011

New Amy Bradley Pattern and Mini Interview

You've got to check out Ruby Slipperz blog and read her "mini interview" with designer Amy Bradley, and Amy's new pattern "Have a Happy Scrappy Day".  It is so darn cute....and she found it at one of my favorite shops.  Click HERE to check it out.

Robin's Nest Update

I just got word from Kaye, one of the quilters that was at the retreat.  "I hear that Mom robin has settled into nest #3. Don't know if eggs are in the works, but will report if I find out."  Thanks, Kaye.

Monday, May 23, 2011

Quilting Retreat and Confused Robins


Just got back from four intense days of sewing at Teton Patchwork Quilter's Retreat in Tetonia, ID. We always have a great time at our retreats, and this one had an additional treat. We watched a pair of robins building these nests. Yes, that is plural....three nests to be exact. The one on the left was there from last year, but was redecorated and updated, checked and re-checked for size. Apparently Dad Robin wanted a newer dwelling, so Mom Robin started nest #2. This one has walls so high she almost didn't have enough room to get out of it. Hm-m-m, still not quite right, so she started nest #3. We took turns watching and reporting her progress so we could get some sewing done. She didn't work on one at a time, but went back and forth between the three all day long. Dad Robin did bring some dried grass and other building material, but spent most of his time strutting, fluffing his feathers and checking Mom Robin's progress.

Do Robins usually make more than one nest? Will she lay eggs in all three, finally choose the right one, or build another nest somewhere else? Is she just really confused about this whole process or just keeping busy until she's ready to lay her eggs, or is her mate just too darn picky? We've been promised updates, so will let everyone know the final decision.
Posted by Picasa

Friday, April 22, 2011

Three more 12 x 12's

Catching Up.....?

I've been trying to play "catch up" after being so far behind in making these little quilts!  Still only halfway there, but here are two that are finished and one almost finished.  First is "green", titled Simply Green, because of the words on one of the fabrics is Simplify.  The back is a fabric with the recycle symbols and a green world.


Next is Tenacity.  This was a difficult word for me because there were just too many ideas and interpretations.  So, I chose that "tenacious leaf" just won't let go, no matter what Mother Nature dishes out.  The background is one of my hand dyes, the branches are twisted fabric strips, and the leaf was free motion stitched with thread.....lots of thread.  What you can't see is what I used as a base to stitch on (besides several layers of Solvy stabilizers).  Kaye had some dried corn silk from last summer that retained its color.  So, I stitched all over the corn silk because I wanted a bit of yellow as well as a more opaque leaf.  I left the strips from the tree branches hanging to represent the roots of the tree.

The next one is my interpretation of the word "road".  After several months of looking at pictures of roads, I saw a photo of a "road runner".  For this one I used water color pencils to blend the sky and add detail to the bird.  I'm still adding stitches to the background, so it is not quite finished, but the end is in sight!

Friday, April 1, 2011

Thread leaf and tenacity

This is the finished little quilt using my "thread" leaf.  It's for the 12X12 group I belong to....trying to catch up since I'm only about six quilts behind.  For those of you who aren't familiar with 12x12's, every other month a word that has been submitted by one of the members is randomly chosen, and we make a 12" quilt with our interpretation of that word.  This is my version of "tenacity".... that one last leaf that just hangs on through everything Mother Nature throws at it.  The background is one of my hand-dyed fabrics, the branch is made by twisting several strips of brown fabric together, adding a new strip for each little twig, and finally the thread leaf applique.  I left the tree strips to represent the roots.

Back to the drawing board!  I've got two more 12 x 12's on the design wall waiting for some quilting and embellishing.

Wednesday, March 30, 2011

Thread Painting

I wanted something really different for one of my little quilts.  At our last Surface Design meeting, one of the demos was about free motion embroidery and how to make your own appliques using stabilizer and thread.  I tried this once about 12-13 years ago with excellent results, but kind of forgot about how much fun it can be.

 I used three layers of Solvy Stabilizer and drew the maple leaf outline onto the top layer with a fine Sharpie marker.  (I had a bunch of dried leaves from my last trip to Maine).  I forgot to take pictures until I started the second layer of thread. 


 It takes a lot of stitches and thread but not a lot of time to make a "thread applique".  The most important thing to remember is that once the stabilizer is rinsed out with water, there is nothing to hold it all together.  So, your stitches have to overlap or criss-cross each other by making a base layer.  Think of it kind of like weaving.....back and forth, up and down.
What do you think?  I don't want it to be as deep a red as the real leaf, so just a bit more and it will be finished.  See all of those light yellow "threads" sticking out from the edge of the stitching?  They're actually dried corn silk one of my friends gave me.  I thought the corn silk would make a fun foundation to stitch through to add a bit of texture.  It worked! 

I'll show you the finished project in a day or two.  Just have to finish the binding and label.

Saturday, March 19, 2011

Finished!

The "American Beauty" quilt top is finished and on its way to Draper!  The pictures aren't great, but you can see how big it is.  That's a CA king bed it's on!  Yes, I'd say it's a "generous" queen size.  If you are near Thimbles & Threads Quilt Shop in Draper, stop by to see it and say "hi" to Cathie Z.
 I couldn't get far enough away to get a full picture and my design wall was way too small to hang it properly.


This was the best I could do to show the size....


Scroll down to the earlier posts to see the pretty pinks and soft yellows.

Sunday, March 13, 2011

What I've Been Up To

The last couple of week have just flown by and I can't believe that it is almost the middle of March.  Between board meetings, guild meetings, and other things, I've been working on a shop sample for Thimbles & Threads.  So, I thought I'd share a few pictures.  This quilt (almost) is Marti Michell's bom, American Beauty.  It really is a beauty (in more ways than one).  Now I know why I don't especially like using templates.....the really small templates!  It's not me as much as old Arthur(itis) in the fingers.  Big templates are fine and by big I mean over 2".  Yes, templates make cutting odd shapes easier and more accurate.  The way the corners of the various pieces are trimmed really do make the process of fitting everything together much better.


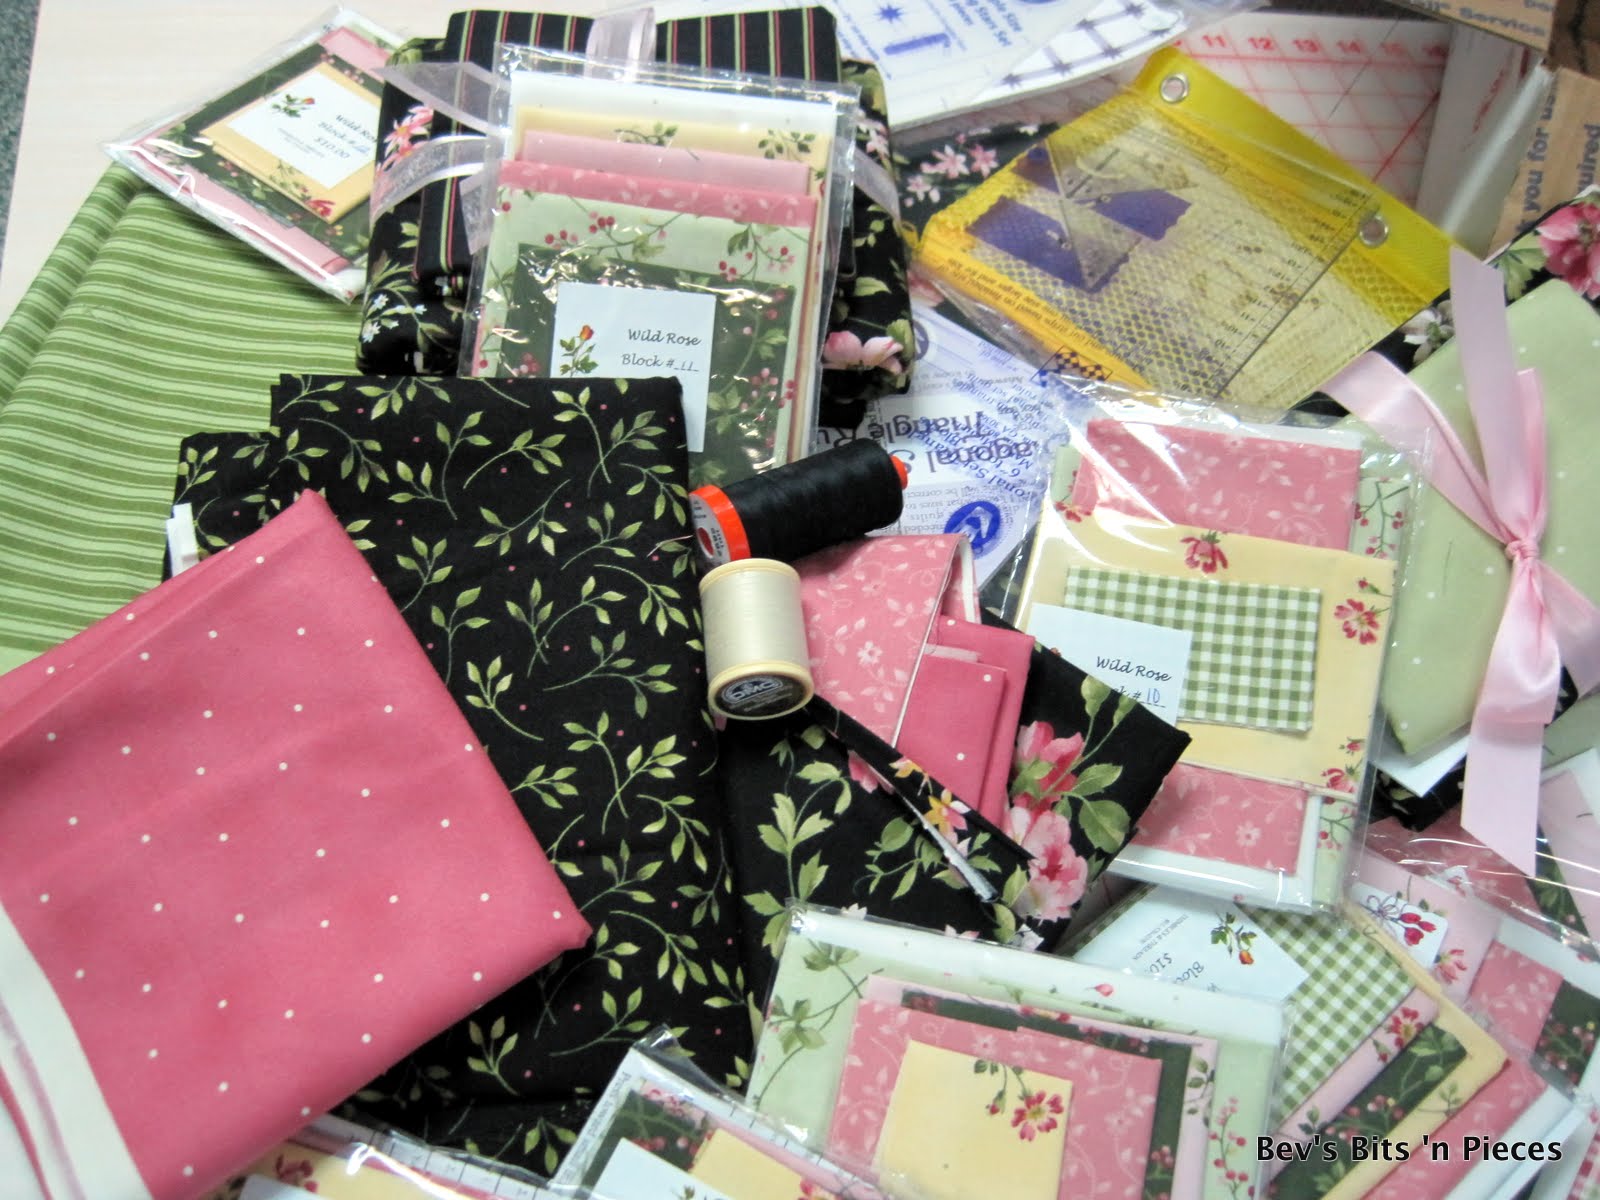
All of these goodies arrived March 1st.  Beautiful fabrics from Maywood Studios, thread, and templates.  There are some pieces of luscious yellow fabric that don't show up very well.


This is one of my favorite blocks.  The black will be the background.


I love the green stripe and dark pink together and the black makes everything pop.  I thought the stripe fabric would be hard to cut straight but it was easy.


These blocks aren't sewn together yet, but you get the idea of how it is going together.  The Friendship Star block, on the left, is my favorite out of the twelve blocks.  I've never seen this setting using five stars in a 12" block.

Ready to start sewing it together!

Friday, February 25, 2011

Snow Dying

Monday was a beautiful winter day and there was plenty of new snow from the day before.  So, we (Kaye & I) decided to snow dye some fabric while we still had snow.  The days have been above freezing so that means melting and heavy, wet snow.  The first time it snowed on Sunday, the temp was hovering just below the freezing point so we had about six inches of the heavy, wet stuff, and around ten p.m. it started to snow again.  This time it was cold enough to produce the dry, granular, powder type snow that skiers love, but there was only about an inch of that.  I tried to scoop the powdery stuff into my last container, but got bombarded with snowballs and a golden retriever that kept sweeping the good stuff around with his tail!  Anyway, here are some of the results of a very fun day!  The hardest part of snow dying is waiting for the snow (in the containers, on top of the fabric) to melt and the dye to trickle down through to the fabric.  The results are worth the wait!